

How to Brew Better Coffee at Home: 7 Easy Fixes
Table of Contents
- Why Your Home Coffee Tastes Flat (and How to Fix It)
- Start with Freshly Roasted Beans
- The Best Water to Coffee Ratio for Balanced Flavor
- A Simple Coffee Grind Size Guide for Every Brewer
- Water Temperature: The Most Overlooked Variable
- How to Store Coffee Beans for Freshness
- Troubleshooting: Fixing Common Brewing Mistakes
- Final Checklist to Brew Better Coffee Tomorrow
- Frequently Asked Questions
Last Updated: September 8, 2026
Why Your Home Coffee Tastes Flat (and How to Fix It)
If your morning cup tastes dull, bitter, or sour, the problem is rarely the beans themselves. It is almost always a fixable flaw in your brewing process. Brewing better coffee at home comes down to mastering bean freshness, grind size, water temperature, and the coffee-to-water ratio.
Brewing better coffee is not about expensive equipment. Most home brewers are one or two small adjustments away from a dramatically improved cup.
Below, we'll walk through the seven most common mistakes holding your coffee back and show you exactly how to fix them, so you have a clear checklist to brew better coffee tomorrow morning.
Start with Freshly Roasted Beans
Freshly roasted coffee is the single biggest factor in flavor. Coffee beans begin losing their aromatic compounds and flavor the moment they are roasted, which is why buying whole beans roasted within the last few weeks makes a measurable difference.
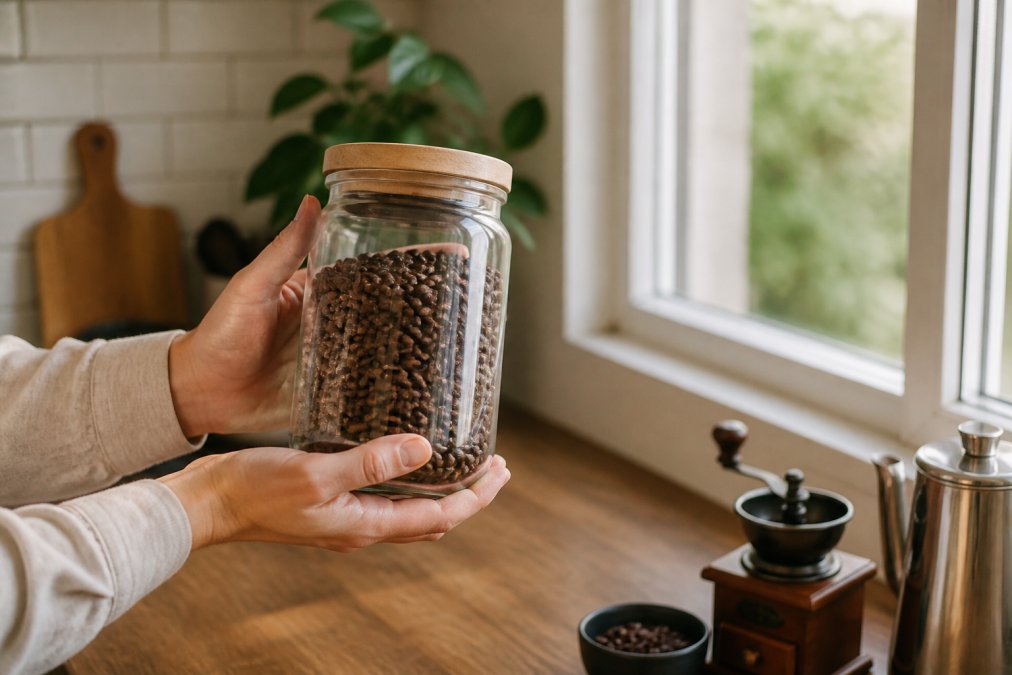
Many home brewers buy beans without checking the roast date; those beans can sit on shelves for months. Look for coffee with a visible roast date, ideally within the past two to four weeks. Roasters who ship shortly after roasting deliver a smoother, richer cup because the flavor is still intact.
Buy whole beans, not pre-ground. Ground coffee loses volatile flavor compounds within minutes. Grinding at home just before brewing preserves the oils and aromatics that create a full body and pleasant mouthfeel.
The Best Water to Coffee Ratio for Balanced Flavor
The golden ratio for most brewing methods is 1:16, meaning one part coffee to sixteen parts water (sca.coffee). This produces a balanced cup without tipping into bitterness or weakness.
For a standard 12-ounce mug, that translates to roughly 21 grams of coffee and 340 grams of water. A digital scale is the most reliable way to measure both, since scoops vary wildly depending on bean density and grind size.
Adjust to taste: use 1:15 for a bolder brew or 1:17 for a lighter cup. The best ratio is the one you enjoy, but 1:16 gives a consistent starting point across pour over, french press, and drip coffee makers.
A Simple Coffee Grind Size Guide for Every Brewer
Grind size controls how quickly water extracts flavor from the grounds. Each brewing method needs a different grind to extract properly.
The general rule is simple: the faster the brew, the finer the grind. Espresso uses a fine grind because water passes through in about 30 seconds; a french press uses a coarse grind because the grounds steep for several minutes. Getting this wrong is the most common reason coffee tastes bitter or sour.
| Brewing Method | Grind Size | Texture Comparison | Typical Steeping Time |
|---|---|---|---|
| French Press | Coarse | Sea salt | 4 minutes |
| Pour Over | Medium | Sand | 2-3 minutes |
| Drip Coffee Maker | Medium | Sand | 4-6 minutes |
| Aeropress | Fine | Table salt | 1-2 minutes |
| Moka Pot | Fine | Table salt | 1-2 minutes |
A burr grinder is the right tool. Blade grinders chop beans unevenly, producing a mix of fine powder and coarse chunks that leads to inconsistent extraction and a muddy, bitter cup. A burr grinder crushes beans between two surfaces for uniform particle size, and even a modest hand grinder outperforms a blade grinder at the same price.
Water Temperature: The Most Overlooked Variable
Water temperature is the variable most home brewers ignore, yet it has an outsized effect on extraction. The ideal range is between 195°F and 205°F (sca.coffee). Water that is too hot scorches the grounds and produces a bitter cup; water that is too cool fails to extract sugars and acids, leaving a sour, weak brew.
Desirable acids and sugars extract readily in the 195°F-205°F window. Push past 205°F and you pull harsh tannins; drop below 195°F and you leave desirable acids locked in the grounds, resulting in a flat, sour cup.
If you do not have a gooseneck kettle with a thermometer, bring water to a boil and let it rest for 30 to 45 seconds before pouring. That pause drops the temperature into the ideal range. Boiling water poured directly over grounds is one of the most common mistakes in home brewing.
For more precision without a variable-temperature kettle, an instant-read kitchen thermometer costs under $15 and removes all guesswork. Heat water to 205°F in any kettle, then pour. This one-time purchase eliminates the biggest variable separating consistent home brews from café-quality cups.
The Bloom Phase and Why It Matters
When you first pour water over fresh grounds, wet them and wait about 30 seconds. This is the bloom phase, and it releases trapped carbon dioxide from the beans. Skipping it allows gas to interfere with extraction, leading to an uneven and weak cup.
Freshly roasted beans contain significant CO2 trapped inside their cellular structure. Pouring all your water at once forces the escaping gas to create channels through the coffee bed, rushing water past dry grounds and under-extracting them, resulting in a sour, thin cup.
A proper bloom, using just enough water to saturate the grounds (roughly twice the weight of the coffee), allows the gas to escape evenly. After 30 seconds, the bed settles and is ready for the main pour.
Water Quality: The Ingredient You Never Think About
Temperature is only half the water equation. Water that is too soft produces a flat, dull cup because there are not enough minerals to carry flavor compounds out of the grounds. Water that is too hard over-extracts and tastes bitter or chalky.
The Specialty Coffee Association recommends water with 150 ppm of total dissolved solids (TDS) for optimal extraction (sca.coffee). Most municipal tap water falls between 100 and 300 ppm, but the mineral balance matters more than the raw number. Magnesium and calcium bind to flavor compounds and help pull them into your cup.
If your tap water tastes good on its own, it will likely brew acceptable coffee. If you notice a persistent off-flavor, try filtered water. A basic carbon filter pitcher removes chlorine and other impurities. Avoid distilled or reverse-osmosis water, with no minerals at all, it produces a flat, lifeless brew.
How to Store Coffee Beans for Freshness
Coffee bean storage is straightforward once you know the enemy: oxygen, light, heat, and moisture. All four accelerate staleness and destroy flavor. Store beans in an airtight, opaque container at room temperature, away from direct sunlight and heat sources.
Many people store beans in the freezer or refrigerator, but that is a mistake. Beans are porous and will absorb moisture and odors from other foods, and temperature fluctuation causes condensation that degrades quality. Room temperature storage in a sealed container is the right approach for beans you use within a few weeks.
Buying in quantities you will finish within two to three weeks is the most practical freshness strategy. While larger bags may cost less per ounce, stale coffee that gets thrown out is wasted money. Smaller, more frequent orders from a roaster that roasts to order ensure every bag is at peak flavor.
Troubleshooting: Fixing Common Brewing Mistakes
When your coffee tastes off, the flavor tells you what went wrong. Sour or salty coffee is usually under-extracted, meaning the water did not pull enough flavor from the grounds. Bitter or dry coffee is typically over-extracted, meaning too much was pulled out.
The table below maps common flavor problems to their causes and fixes. Use it as a diagnostic guide the next time a cup disappoints.
| Problem | Likely Cause | The Fix |
|---|---|---|
| Sour, salty taste | Under-extraction | Grind finer or increase brew time |
| Bitter, dry taste | Over-extraction | Grind coarser or reduce brew time |
| Weak, watery body | Too little coffee | Increase the coffee-to-water ratio |
| Muddy, gritty cup | Grind too fine for method | Use a coarser grind |
| Flat, cardboard flavor | Stale beans | Buy freshly roasted beans in smaller batches |
But a single fix often is not enough. The most frustrating cups combine multiple problems, bitter and weak, or sour and muddy, because extraction issues compound. Here is how to diagnose the more complex cases.
When Your Coffee Is Bitter AND Weak
This combination usually points to a grind that is too fine for your brewing method, combined with too little coffee in the basket. The fine grind over-extracts small particles, creating bitterness, while the low dose means the overall strength is thin. Fix this by grinding coarser first, then increasing your coffee dose by 1-2 grams. Taste again before changing anything else.
When Your Coffee Is Sour AND Bitter at the Same Time
This contradictory profile is the signature of uneven particle size, almost always from a blade grinder. The fine particles over-extract and taste bitter, while the coarse chunks under-extract and taste sour. No amount of ratio or temperature adjustment will fix this. The solution is a burr grinder that produces uniform particles. If you are using a blade grinder, this is the one upgrade that will transform your coffee more than any other single change.
Channeling: The Hidden Culprit in Pour Over
Channeling plagues pour over brewers. It happens when water finds a path of least resistance through the coffee bed, leaving some grounds dry and over-extracting others. Fix this by pouring in slow, circular motions and ensuring the grounds are evenly saturated during the bloom phase.
Channeling can also result from an uneven coffee bed. After your bloom, give the brewer a gentle swirl to flatten the bed and knock down any grounds clinging to the sides. A level bed is one of the most underrated techniques in pour over brewing.
The 5-Minute Diagnostic Routine
When a cup disappoints, do not change everything at once. Change one variable, brew again, and taste. Here is a systematic approach:
- Taste and identify the primary flaw: sour, bitter, weak, or muddy.
- Check your grind size against the chart in the grind section above. This is the most common source of flavor defects.
- Verify your ratio with a scale. Guessing with scoops introduces 20-30% variation cup to cup.
- Confirm water temperature, if you boiled and poured immediately, let it rest longer next time.
- Brew one test cup with a single adjustment. If the flaw persists, move to the next variable.
The Flavor-to-Fix Quick Reference
Here is a condensed version of the diagnostic logic professional baristas use when dialing in a new coffee:
- Sour with a thin body → grind finer (under-extraction is the primary issue)
- Sour with a heavy, syrupy body → increase water temperature (acids are not dissolving)
- Bitter with a dry finish → grind coarser (tannins are over-extracting)
- Bitter with a hollow center → reduce brew time (too much contact)
- Weak with no flavor at all → increase coffee dose (ratio is too low)
- Muddy with sediment → check your filter and grind size (too fine for method)
This framework turns troubleshooting from guesswork into a repeatable process, helping you identify and fix problems faster.
Final Checklist to Brew Better Coffee Tomorrow
The path to brewing better coffee at home is a sequence of small, repeatable habits rather than one dramatic change.
Here is your checklist for tomorrow morning:
- Use whole beans roasted within the past 2-4 weeks
- Grind fresh with a burr grinder, not a blade grinder
- Match grind size to your brewing method using the guide above
- Weigh your coffee and water for a 1:16 ratio
- Heat water to 195°F-205°F and let boiling water rest
- Allow a 30-second bloom phase before full pouring
- Store beans in an airtight, opaque container at room temperature
Start with freshly roasted beans and a proper grind, then dial in your ratio and temperature. The payoff is a smooth, rich cup every morning.

Frequently Asked Questions
What is the most effective way to brew better coffee at home?
The most effective way is to address the four fundamentals in order: buy freshly roasted whole beans, grind them right before brewing, use the correct coffee-to-water ratio, and ensure your water is at the right temperature. Most home brewers see the biggest improvement by switching to a burr grinder and weighing their coffee instead of scooping it.
What is the 15-15-15 rule for coffee?
The 15-15-15 rule is a simple memory aid for pour-over brewing: use 15 grams of coffee per 250 ml of water, wait 15 seconds after pouring hot water over the grounds to let them bloom, and pour the remaining water in 15 seconds intervals. It is a beginner-friendly starting point that you can adjust to taste.
Does water temperature affect coffee extraction?
Yes, water temperature directly affects extraction. Water that is too hot, above 205°F, over-extracts the coffee, causing bitter flavors. Water that is too cool, below 195°F, under-extracts it, leaving sour, weak coffee. The ideal range is between 195°F and 205°F.
How do I know if my coffee is under-extracted or over-extracted?
Under-extracted coffee tastes sour, salty, or sharply acidic, and it often feels thin in the mouth. This usually means your grind is too coarse or your brew time is too short. Over-extracted coffee tastes bitter, dry, or hollow, and it happens when the grind is too fine or the brew time is too long.
Making these changes is easier when your beans arrive fresh. Cenia's Coffee roasts to order and ships quickly, so the beans on your counter are at peak flavor when you brew. With carefully sourced single-origin options and simple, reliable delivery, you can enjoy a professional-quality cup without leaving your home office. Get started with Cenia's Coffee and taste the difference fresh beans make in your daily routine.