

Water Temperature for Pour-Over Coffee: A Flavor Guide
Table of Contents
- Why Water Temperature Matters for Pour-Over Coffee Flavor
- Best Water Temperature for Pour-Over Coffee
- Coffee Brewing Temperature and Extraction
- Pour-Over Coffee Brewing Temperature by Roast
- How to Control Kettle Temperature for Coffee
- Temperature Variations Across Your Brew
- A Simple Temperature Tasting Experiment
- Frequently Asked Questions
Last Updated: October 5, 2026
Why Water Temperature Matters for Pour-Over Coffee Flavor
Water temperature is the single most important variable you control when brewing pour-over coffee, and mastering water temperature pour-over technique directly determines your cup's flavor profile. It directly determines how fast your coffee grounds release flavor compounds into the water.
When water is too hot, it pulls out bitter compounds along with the good stuff. You get a harsh, burnt-tasting cup. When water is too cool, it doesn't pull out enough flavor at all. You get a thin, sour, underdeveloped cup.
Understanding this relationship transforms how people brew. It's chemistry, and once you know how it works, dialing in your perfect cup becomes straightforward.
You don't need expensive equipment, a simple thermometer and attention make all the difference between an average cup and one that showcases the beans you're brewing.
Best Water Temperature for Pour-Over Coffee
The ideal water temperature pour-over range falls between 195°F and 205°F. This range extracts the right balance of flavors without pulling too many harsh compounds.
Most coffee professionals recommend starting at 200°F. If your coffee tastes too sour, try 202-205°F; if too bitter, drop to 195-198°F.
Here's what happens at different temperatures:
- 195-198°F: Gentler extraction. Good for light roasts and delicate, fruity beans. Results in cleaner, brighter cups.
- 200-202°F: The sweet spot for most coffee. Balanced extraction. Works for medium roasts and most single-origin beans.
- 203-205°F: Stronger extraction. Good for dark roasts and when you want a fuller body and deeper flavors.
Water temperature choice depends on roast level, bean origin, and desired flavor profile. A light roast from Ethiopia tastes completely different at 195°F versus 205°F.
Water cools as it travels from kettle to dripper, expect a 3-5 degree drop depending on how long the water sits before pouring.
Coffee Brewing Temperature and Extraction
Extraction is dissolving soluble compounds from coffee grounds into water, pulling flavor out of the bean.
Hotter water speeds extraction; cooler water slows it. This is why temperature is a powerful control lever.
How hotter water changes extraction
Hotter water speeds extraction: molecules move faster, collide with coffee particles more forcefully, and flavor compounds dissolve more quickly.
Coffee grounds contain hundreds of compounds, some sweet and balanced, others bitter and harsh. Water above 205°F extracts both at the same fast rate, producing a bitter, burnt, or harsh cup.
How cooler water changes extraction
Cooler water slows extraction, stretching brewing time and requiring slower pouring.
Water below 195°F doesn't extract enough flavor, good compounds lack energy to dissolve, producing a thin, sour, underdeveloped cup.
The key insight: temperature controls how much flavor you pull out, not which flavors you pull out. This is why dialing in temperature is so powerful.
Pour-Over Coffee Brewing Temperature by Roast
Roast level is the most visible factor, but processing method, altitude, and bean density also influence extraction speed. Understanding all three helps you make better temperature decisions.
Temperature by roast level
Light roasts are denser and roasted 8-10 minutes, so flavor compounds dissolve slowly. Use hotter water (200-205°F) to extract enough flavor in reasonable time. Light roasts handle hot water well since roasting hasn't yet broken down cell structure or created burnt compounds.
Medium roasts are roasted 10-12 minutes and most forgiving, working across 195-205°F. Start at 200°F and adjust based on taste.
Dark roasts are roasted 12-14+ minutes and less dense. Use cooler water (195-200°F) to avoid over-extracting bitter, ashy flavors already concentrated in dark roasts.
Processing method matters as much as roast
How a coffee is processed, washed, natural, or honey, affects its density and how quickly it extracts. This can override roast-level guidance.
Washed coffees have fruit and mucilage removed before drying, making them less dense and faster-extracting. Use the lower end of your temperature range (195-200°F for medium roasts, 198-203°F for light roasts).
Natural-processed coffees are dried with fruit attached, creating denser beans that extract slower. Use the higher end of your temperature range (200-205°F for medium roasts, 202-205°F for light roasts).
Honey-processed coffees fall between washed and natural in density. Use mid-range temperatures (198-202°F for medium roasts).
A natural-processed light roast from Ethiopia might need 203-205°F, while a washed light roast from the same region tastes better at 198-200°F. Following only the "light roast = hot water" rule risks over-extracting washed coffee and under-extracting natural.
Altitude and bean density
Coffees grown above 5,000 feet are denser (plants grow slowly in cool conditions) and extract slower, benefiting from slightly hotter water.
Coffees below 4,000 feet are less dense and extract faster. Use slightly cooler water to avoid over-extraction.
Altitude is a smaller effect than roast or processing method. If brewing a high-altitude washed light roast, density pushes toward hotter water (aligning with light-roast guidance). If brewing a low-altitude natural medium roast, density pushes toward cooler water (conflicting with natural-process guidance), start at 200°F and adjust based on taste.
Decision framework: Choosing your starting temperature
Use this framework to pick a starting temperature instead of relying on roast level alone:
Start with roast level as your baseline:
- Light roast: 200-205°F
- Medium roast: 195-205°F
- Dark roast: 195-200°F
Adjust for processing method:
- Washed: Move 2-3°F cooler than baseline
- Honey: No adjustment
- Natural: Move 2-3°F hotter than baseline
Fine-tune for altitude (if known):
- High altitude (5,000+ feet): Move 1-2°F hotter
- Low altitude (below 4,000 feet): Move 1-2°F cooler
Example: A natural-processed light roast from high altitude would start at 200°F (light roast baseline) + 3°F (natural processing) + 1°F (altitude) = 204°F.
A washed medium roast from low altitude would start at 200°F (medium baseline) − 2°F (washed) − 1°F (altitude) = 197°F.
These are starting points, not final answers. Brew at your calculated temperature, taste the cup, and adjust by 1-2°F based on whether it tastes sour (too cool) or bitter (too hot).
Why this matters
Most guides simplify temperature advice to roast level alone because it's easy to remember. But roast level accounts for only part of the extraction equation. A coffee's processing method and origin altitude are printed on the bag. Using all three factors means you'll dial in your brew faster and with fewer disappointing cups. After a few brews, you'll develop intuition for how different coffees respond and can adjust confidently.
How to Control Kettle Temperature for Coffee
Controlling water temperature requires understanding where temperature loss happens and measuring accurately. Most fail to hit target temperature consistently because they don't account for cooling between kettle and coffee bed, or use thermometers incorrectly.
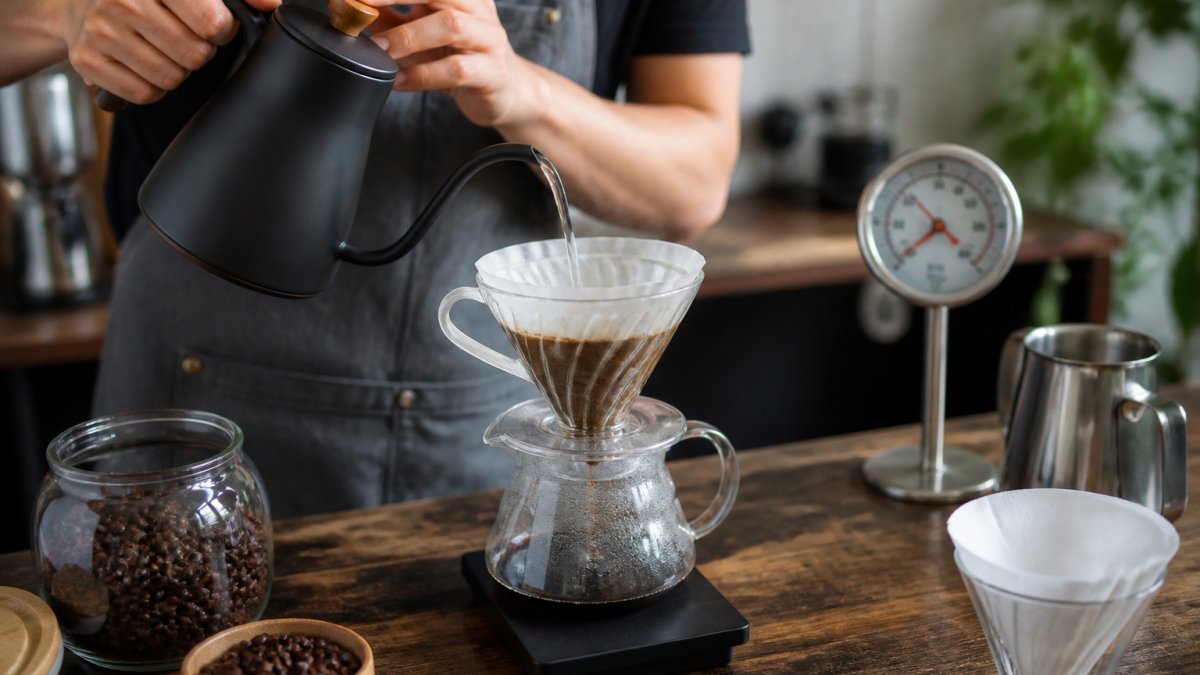
Thermometer placement and accuracy
A dial or basic digital thermometer ($10-20) works fine, but placement determines what you're measuring.
Measure in the kettle, not the air. Stick your thermometer directly into the water (center is warmer than edges). Wait 30 seconds for stabilization before reading.
Account for kettle-to-dripper cooling. Water cools as it sits in the kettle (1-2°F per minute), travels through air (2-3°F loss), and contacts a cold dripper (1-3°F drop). Total cooling ranges 3-8°F depending on setup and kettle design. A gooseneck kettle minimizes air exposure and cooling loss.
Practical solution: Heat water 5-7°F above target temperature to account for unavoidable cooling.
Preheating your equipment
A cold dripper, filter, and cup act as a heat sink, causing 2-4°F loss immediately on first contact.
Preheat your dripper and cup: Pour about 2 ounces of hot water through your empty dripper and cup, swirl to warm, then discard. This 30-second step prevents extra heat loss on first contact.
Rinse paper filters with hot water during this step to remove dust and warm the filter.
Kettle choice and consistency
A gooseneck kettle ($25-50) improves consistency by reducing splashing, heat loss, and improving pour control. A standard kettle works fine if you pour carefully, controlled rate matters more than kettle type.
Workflow for consistent temperature
- Heat water to your target temperature plus 5-7°F
- While water heats, set up your dripper and place it on your cup
- Once water reaches temperature, remove from heat
- Preheat your dripper and cup with a small amount of hot water (30 seconds)
- Check water temperature in the kettle with your thermometer (should still be within 1-2°F of target)
- Begin pouring immediately after checking
- Pour slowly and steadily to maintain even extraction
Move quickly from heating to pouring to minimize cooling. If you wait more than 2 minutes, recheck temperature and adjust upward if needed.
Troubleshooting temperature consistency
Problem: Temperature drops too much between kettle and cup, Use a gooseneck kettle, preheat your dripper, and pour immediately.
Problem: Thermometer readings vary widely, Ensure the bulb is fully submerged (not touching kettle bottom), wait 30 seconds, and measure in the center.
Problem: Water cools too quickly during slow pour, Heat water 7-10°F above target if brew time exceeds 4 minutes, or use a thermal carafe.
Problem: Difficulty hitting the same temperature, Use the same kettle, heat to the same visual cue, and measure at the same point. Consistency matters more than perfection; hitting 198-202°F consistently beats varying 195-205°F.
Temperature Variations Across Your Brew
Water temperature drops throughout your brew, the first pour is hottest, cooling as it sits in the dripper. This matters more with longer brew times (4-5 minutes show more variation than 2-3 minutes). If brewing slowly, start with slightly hotter water. A thermal carafe or warmer room helps maintain consistency. Consistency matters more than perfection: pick a temperature, stick with it, and adjust based on taste. Small variations are fine; big swings cause problems.
A Simple Temperature Tasting Experiment
The best way to understand how temperature affects flavor is to taste it yourself.
Here's a controlled experiment you can do at home:
What you need:
- One bag of coffee (use a medium roast to start)
- A thermometer
- Three cups
- Your pour-over setup
- A kettle
The experiment:
- Grind 20 grams of coffee for each brew
- Brew one cup at 195°F
- Brew one cup at 200°F
- Brew one cup at 205°F
- Let all three cool to the same temperature (about 5 minutes)
- Taste them side by side
What to notice:
The 195°F cup will taste bright and sour. You'll notice acidity. The flavors feel sharp and clean.
The 200°F cup will taste balanced. The sweetness comes through. The cup feels fuller and rounder.
The 205°F cup will taste darker and heavier. You might notice bitterness or a burnt edge. The body feels thicker.
This experiment takes 20 minutes and teaches you more than reading about temperature ever could.
Try this experiment with different roasts. Light roasts show even bigger differences. Dark roasts show more subtle differences. Single-origin beans respond more dramatically than blends.
This is how you dial in your personal preference. There's no "best" temperature. There's only the temperature that tastes best to you.
Getting your water temperature right is the fastest way to improve your pour-over coffee.
Start with a thermometer and 200°F water. Once you know your preference, you can dial in any of our single-origin beans to taste exactly how you want them. Our Peru, Ethiopia Natural, Kenya, and Tanzania coffees all respond beautifully to temperature adjustments.

Frequently Asked Questions
What is the best temperature to brew pour-over coffee?
The ideal water temperature for pour-over coffee falls between 195°F and 205°F (90°C to 96°C). Most specialty coffee professionals recommend starting at 200°F (93°C) as a baseline. This range allows proper extraction of soluble compounds that create flavor, sweetness, and body without pulling out excessive bitter compounds. If your coffee tastes thin or sour, try the higher end; if it tastes harsh or bitter, move toward the lower end.
Does hotter water make pour-over coffee more bitter?
Yes. Water hotter than 205°F (96°C) accelerates extraction, pulling more soluble compounds from the coffee grounds in less time. This faster extraction can result in harsh, over-extracted flavors and bitterness. Boiling water (212°F/100°C) should be avoided for pour-over brewing. Instead, let boiling water cool for 30 seconds to 1 minute before pouring to reach the optimal temperature range.
How does water temperature affect coffee extraction?
Water temperature directly controls extraction rate, how fast soluble compounds dissolve from the coffee grounds into your cup. Hotter water extracts faster, which can increase bitterness and reduce clarity if taken too far. Cooler water extracts slower, which can leave the coffee under-extracted, thin, and sour. The relationship between temperature and extraction rate is why adjusting water temperature is one of the most effective ways to fine-tune pour-over flavor without changing your grind size or brew time.
Should you use different water temperatures for light and dark roasts?
Yes. Light roasts and medium roasts typically benefit from water closer to 200-205°F (93-96°C) to fully develop their bright acidity and complexity. Dark roasts, which have denser bean structure and less soluble material, often work better at 195-200°F (90-93°C) to avoid over-extraction and excessive bitterness. Medium roasts sit in the middle. Roast density affects how quickly water penetrates the bean, so adjusting temperature by roast level helps you extract the intended flavor profile.